Instant Deployment Made Easy: How to Deploy Web Apps on Azure Static Web Apps.


Azure Static Web Apps is a service that deploys full-stack web apps automatically to Azure from a code repository. This service has been designed to meet the daily workflow of developers, where apps are built and deployed based on code changes. When an Azure Static Web Apps resource is created, Azure interacts directly with GitHub or Azure DevOps to monitor a branch of choice. Whenever there is a code change through push commits or acceptance of pull requests, a build automatically runs and the app and API are deployed to Azure.
This service supports popular web development frameworks such as React, Angular, Vue.js, and static site generators such as Gatsby and Hugo. In this article, I will walk you through the steps required to deploy a web app on Azure Static Web App through two different methods:
Azure Portal
Azure Static Web App CLI
Prerequisites
Before we move forward in deploying our apps, we need the following:
An Azure Account, which can be created here.
A Github repository that contains the code to be deployed. You can find the repository used in this article here.
Once you are set, let's proceed!
Deployment through the Azure Portal
Step 1: Create a new Azure Static Web App
The first step is to create a new Azure Static Web App in the Azure portal. Follow these steps to create the app:
Log in to the Azure portal (portal.azure.com).
Click on "Create a resource" in the top left corner of the dashboard.
Search for "Static Web Apps" in the search bar.
Click on "Static Web Apps (Preview)" from the list of results.
Click on the "Create" button to create a new static web app.

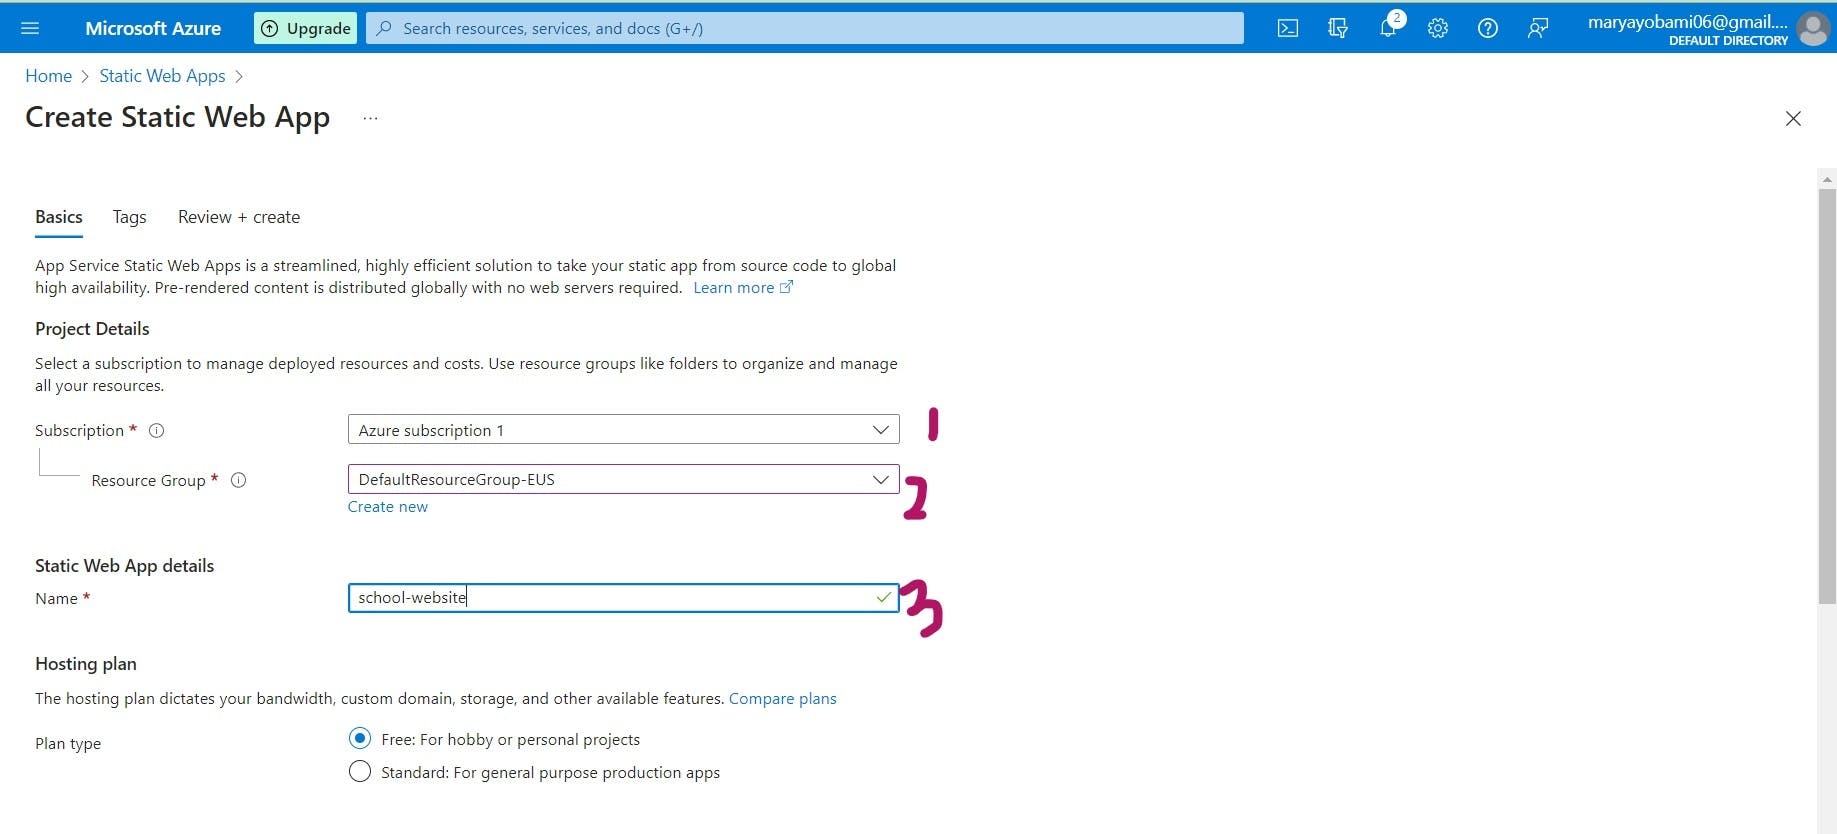
Step 2: Configure the Static Web App
Go ahead to select a subscription, resource group (or create a new one), and give a name to your app as shown in the image below:
Under Deployment Details , Select the source where your code is located. For Github, you may have to authorize Azure to connect to your Github account if you have not done so before.
Then, Select the repository where your web app code is hosted. Select the branch that you want to deploy.

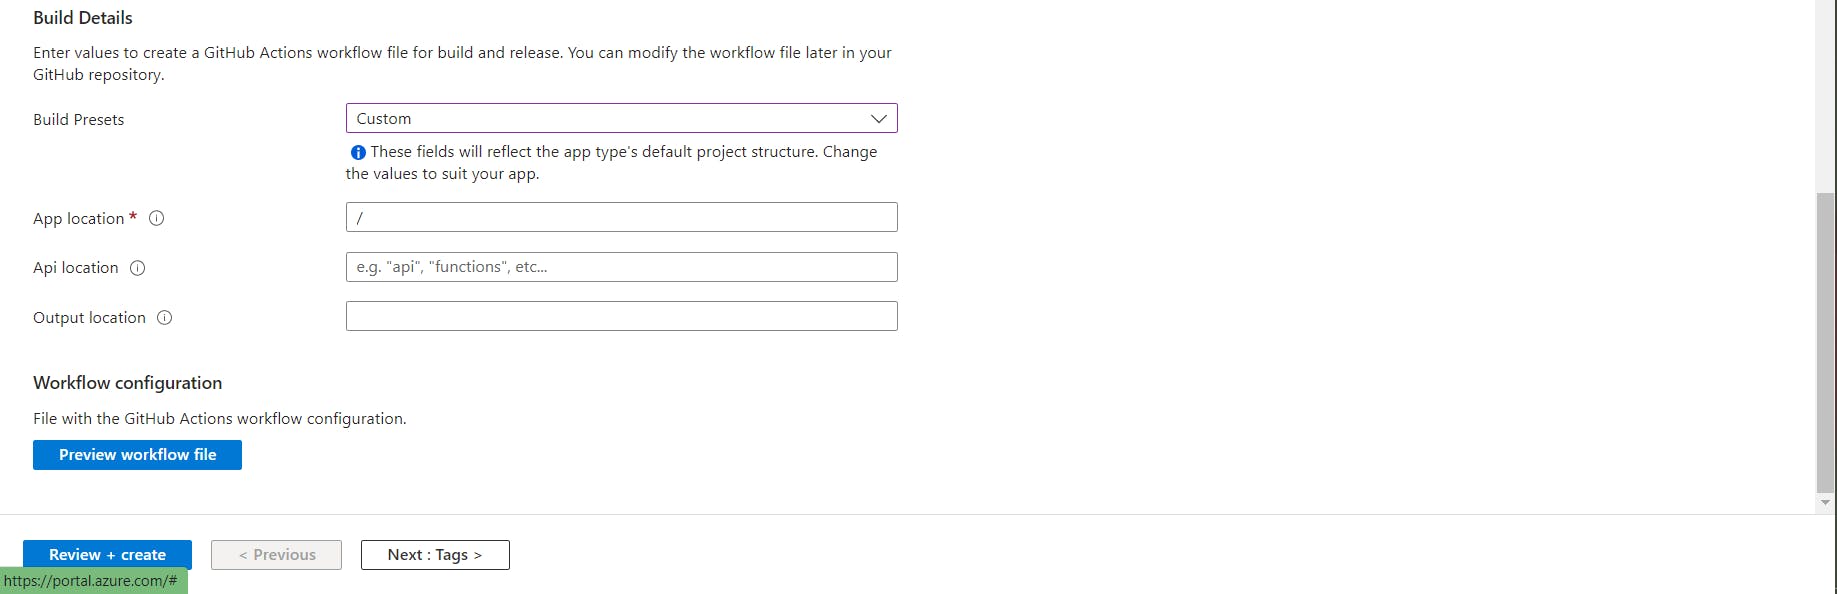
Choose the build command that will be used to build your web app. This could be a script in your package.json file or a custom command. Specify the output folder where the built files will be located. Choose the deployment environment for your static web app. You can choose between a preview or production environment. Click on the "Review + create" button to review your settings.
Step 3: Review and deploy the Static Web App
After configuring the static web app, you need to review the settings and deploy it. Follow these steps to review and deploy the app:
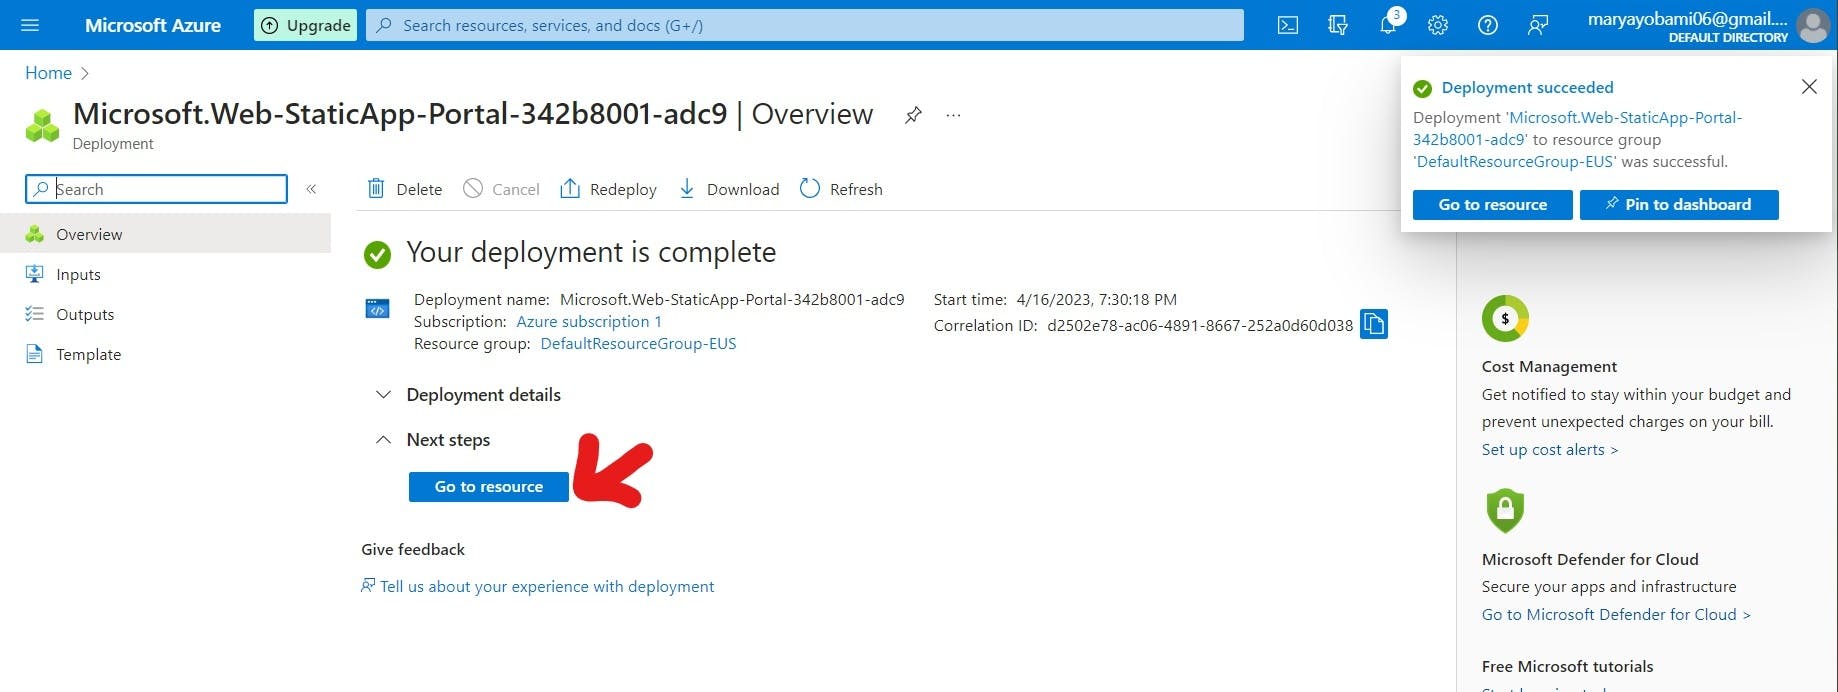
On the "Create a Static Web App" page, click on the "Review + create" button. Review your settings and make any necessary changes. Click on the "Create" button to create and deploy your static web app. Wait for the deployment to complete. You can view the deployment progress in the "Notifications" section.
Step 4: Access your Static Web App
Once the deployment is complete, you will receive a notification. To access your web app, click on 'Go to Resource'.

From there, you can directly access your web app by clicking on the "Browse" button. Alternatively, you can copy the URL of your web app.
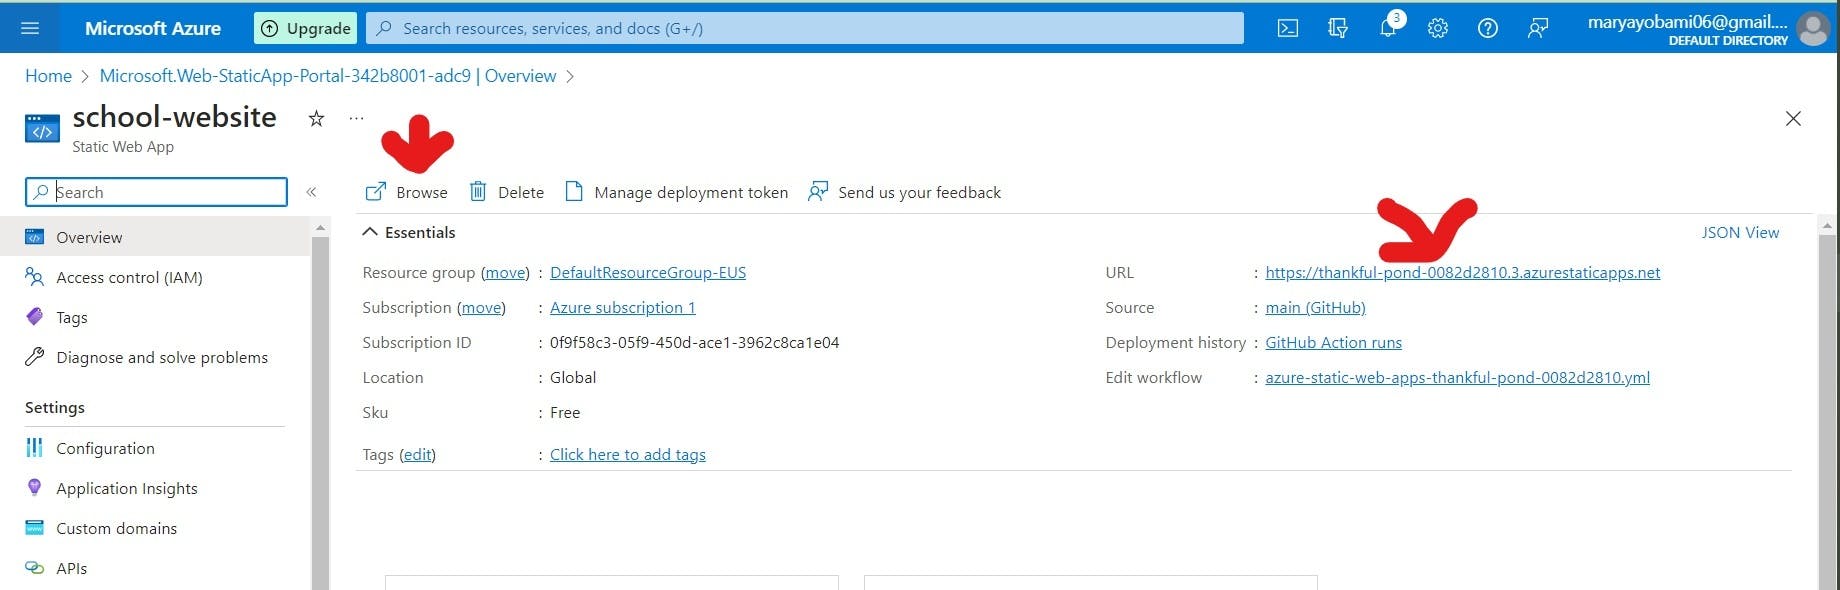
Step 4: Accessing your Static Web App
Once the deployment is complete, you will receive a notification. To access your web app, click on 'Go to Resource'.
From there, you can directly access your web app by clicking on the "Browse" button. Alternatively, you can copy the URL of your web app.

And voila! Your web app is up and running.!

Deployment through the Azure SWA CLI
Another deployment option is the Azure Static Web Apps CLI, also known as SWA CLI. It is a local development tool for Azure Static Web Apps that can deploy your app to Azure Static Web Apps.
To use the SWA CLI, you need to install it first. You can install it globally using the following command:
npm install -g @azure/static-web-apps-cli
After a successful installation, navigate to the code you want to deploy and change the directory. To initialize a new static web app project, use the following command:
swa init
This command will prompt you to choose a configuration name for your app. After that, you will be shown an overview of the configuration settings. If the settings are correct, enter YES then proceed to deploying your app.
To deploy your app to Azure Static Web Apps, type the following command:
To deploy to Azure Static Web Apps, type:
swa deploy
Conclusion
Azure Static Web Apps makes it easy to deploy web apps to a secure and scalable environment. By following the steps outlined in this article, you can deploy your web app to Azure Static Web Apps in just a few minutes.